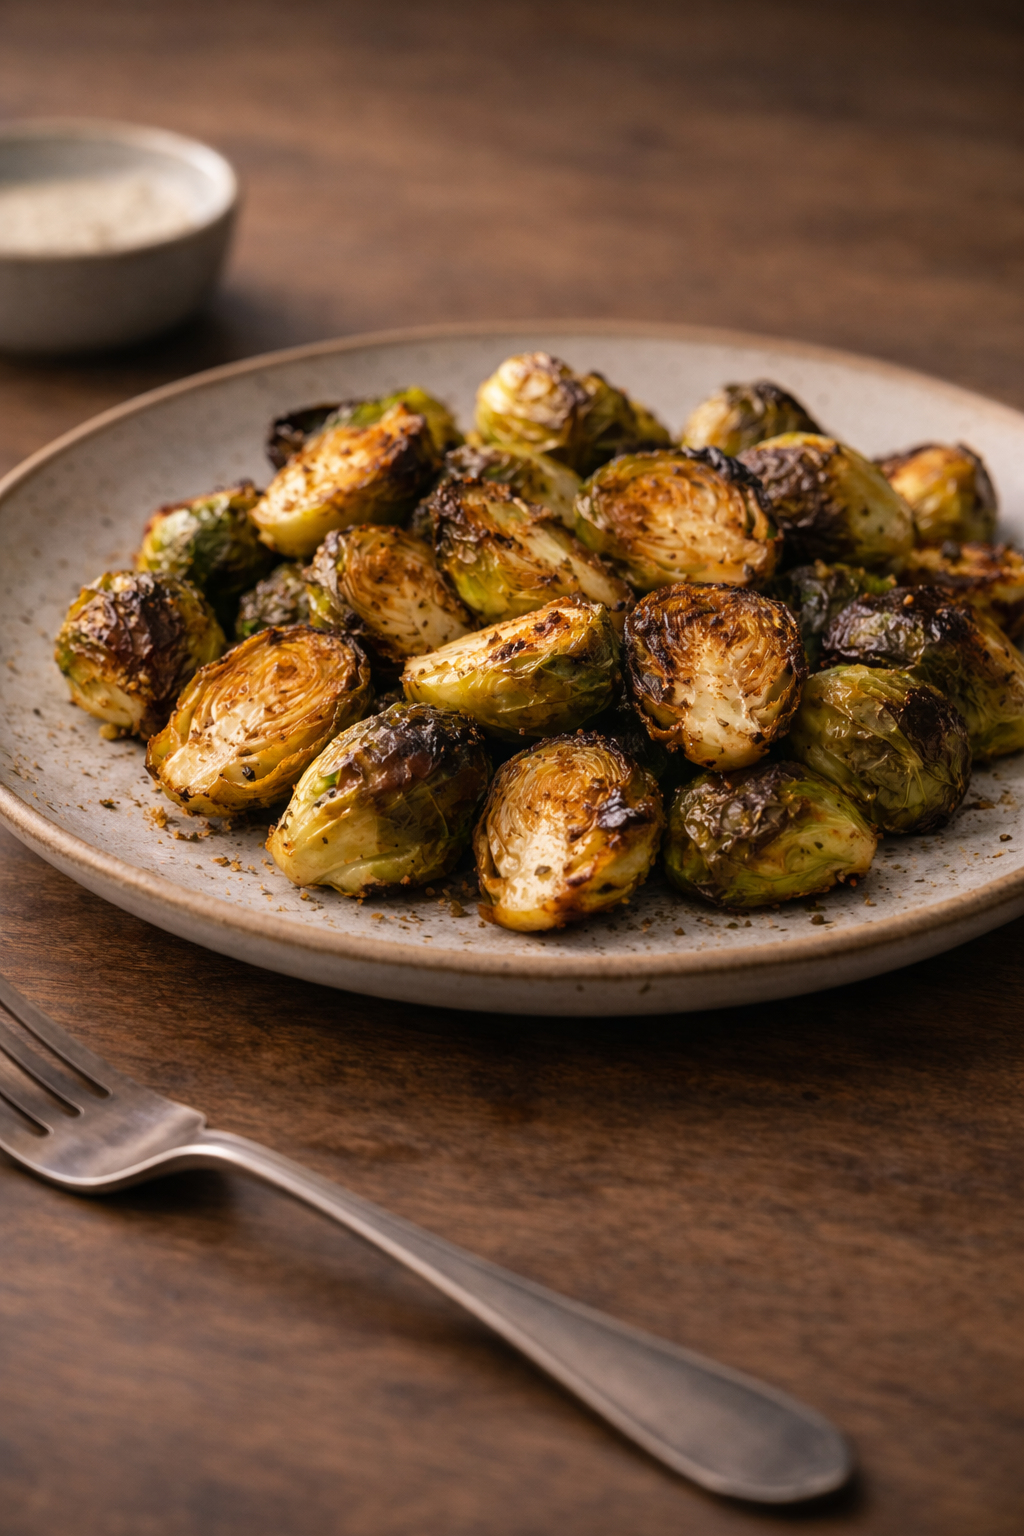
Sometimes the simplest side ends up being the one everyone keeps reaching for. Brussels sprouts cooked this way don’t need sauces or extra steps — just heat, a bit of oil, and enough time to turn crisp at the edges and tender in the center.
At a Glance
- Difficulty: Easy
- Prep Time: 5 minutes
- Cook Time: 12–15 minutes
- Total Time: About 20 minutes
- Servings: 2–3
Why This Method Works
Brussels sprouts are naturally dense, which means they need enough heat to soften inside while still developing texture outside. The air fryer handles both at once.
Cutting them in half is important — it exposes a flat surface that can brown directly against the hot air and basket. That’s where most of the crisp texture comes from. Whole sprouts tend to stay firmer and don’t caramelize as evenly.
Olive oil plays a bigger role than just coating. It helps transfer heat to the surface, allowing the outer leaves to crisp instead of dry out. Garlic powder works better than fresh garlic here because it won’t burn during high-heat cooking.
More ideas: Easy Air Fryer Chicken Nuggets Kids Actually Like
5-Minute Crispy Halloumi with Honey and Thyme
Easy Air Fryer Stuffed Olives Snack
Ingredients
Instructions
- Trim the ends of the Brussels sprouts and remove any loose or damaged outer leaves. Cut each sprout in half lengthwise so you get a flat side for better browning.
- Place them in a bowl and add the olive oil, salt, pepper, and garlic powder. Toss thoroughly so every piece is lightly coated. Uneven coating leads to uneven browning.
- Preheat the air fryer to 200°C / 400°F for about 2 minutes. Starting hot helps the sprouts begin crisping immediately rather than softening first.
- Arrange the sprouts in a single layer in the basket. Place as many as possible cut side down — this is where the deepest browning happens.
- Cook for 6–7 minutes, then shake the basket or turn the sprouts. This redistributes them so different sides get exposed to heat.
- Continue cooking for another 6–8 minutes. The edges should turn deep golden brown, and some outer leaves may become crisp and slightly charred — that’s where the flavor develops.
- Taste one before removing everything. The center should be tender, not hard. If needed, cook for an extra 1–2 minutes.
- Serve immediately while hot. Brussels sprouts lose their crispness as they sit.
What Actually Matters
- Cut side down = better browning and texture
- High heat from the start = crisp edges instead of soft surfaces
- Even coating with oil = consistent cooking
- Serving immediately = best texture
Texture & Flavor
You’re aiming for contrast:
- crisp, caramelized edges
- tender interior
- slightly nutty, roasted flavor
- light garlic background, not overpowering
If they taste bitter, they may be overcooked or too charred. If they’re soft but pale, they needed more space or higher heat.
Ingredient Swaps & Variations
- Add acidity at the end
A squeeze of lemon juice or a splash of balsamic vinegar after cooking brightens the flavor and balances the natural bitterness. Add it after cooking, not before, to avoid steaming. - Extra crisp version
Toss with a small spoon of cornstarch before air frying. This creates a slightly drier surface, which helps the outer leaves crisp more aggressively. - Different seasoning profiles
Swap garlic powder for smoked paprika, chili flakes, or a spice blend. Keep dry spices rather than wet marinades — moisture reduces crispness. - Cheese finish
Add grated parmesan right after cooking while the sprouts are still hot. It melts slightly and adds a salty, savory layer. - Sweeter variation
Drizzle a small amount of honey or maple syrup at the end. This works especially well if you also add a touch of acid to balance it.
Common Mistakes to Avoid
- Overcrowding the basket
When sprouts are packed too tightly, they release moisture and steam instead of crisping. This leads to soft, pale results. Always leave space or cook in batches. - Skipping preheating
Starting in a cold air fryer slows down browning. The sprouts begin by softening rather than crisping, which affects final texture. - Not placing cut side down
The flat surface is where the best browning happens. If most pieces face upward, you lose that deep, caramelized layer. - Using too little oil
Without enough oil, the sprouts can dry out before they crisp. The result is tough edges instead of crisp ones. - Adding wet ingredients too early
Sauces or liquids added before cooking create steam. This prevents browning and results in softer sprouts.
How to Serve
These work in multiple ways depending on what you need:
- as a quick side for meat or fish
- tossed into a grain bowl
- served with a dipping sauce
- or eaten straight from the plate as a snack
They’re best fresh, but you can reheat them briefly in the air fryer to bring back some crispness.
FAQ
Can I use frozen Brussels sprouts?
Yes, but they won’t get as crisp. Cook a bit longer and expect a softer texture.
Why aren’t mine crispy?
Most likely overcrowding or not enough heat. Give them space and start hot.
Do I need to soak them first?
No. Just trim and cut — soaking adds moisture, which works against crisping.
Can I make them ahead?
They’re best fresh, but can be reheated for a few minutes in the air fryer.
You may also like: Air Fryer Halloumi Sticks
Easy Air Fryer Roast Potatoes with Almost No Effort
Easy Air Fryer Banana Bread with Everyday Ingredients
Leave a Reply