
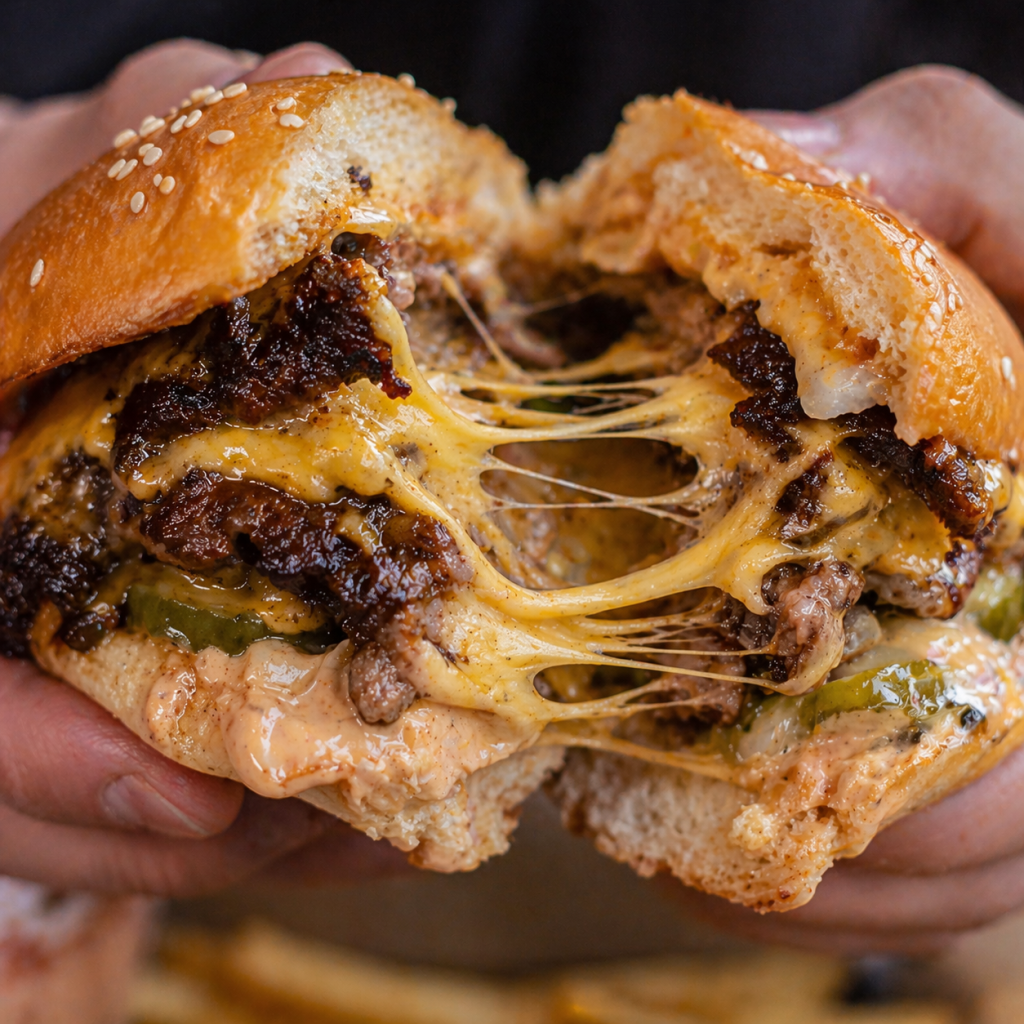
That first bite is all about the edges — thin, crispy, almost caramelized… and then suddenly it’s juicy, soft, and messy in the best way. It’s not a thick burger. It’s not a fancy burger. It’s the kind you crave again before you even finish the first one.
The secret isn’t complicated, but it does matter how you do it. Timing, heat, pressure — all of it changes the texture.
I started making these at home thinking they’d be “close enough.”
They weren’t. They were better.
And don’t forget napkins — it’s so good you’ll stop caring about eating neatly. But let’s be honest… that’s kind of the point with burgers.
10 minutes of prep, 10 minutes of cooking, and you’ve got 4 burgers ready.
What You Need to Make Smash Burger Recipe at Home
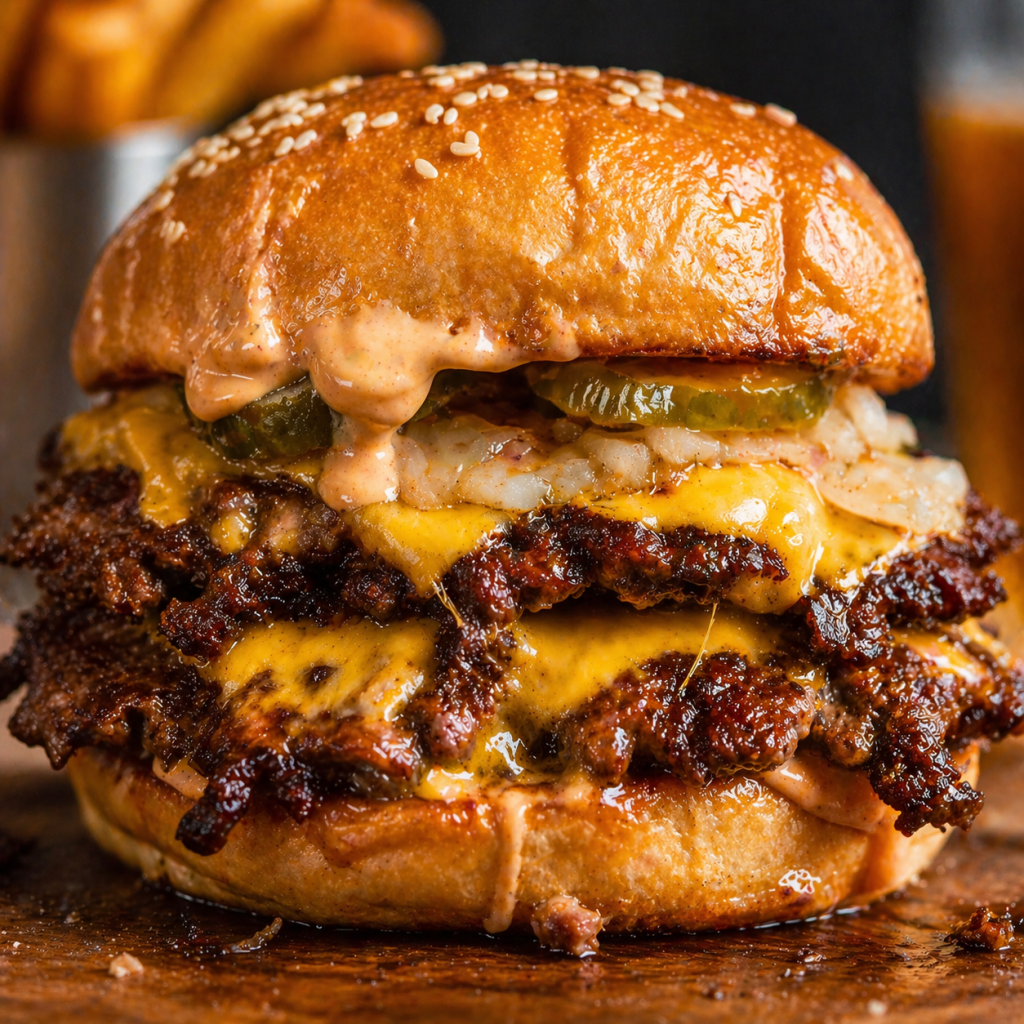
- 500 g ground beef (80/20 fat ratio works best)
- 4 burger buns
- 4 slices cheddar cheese
- 1 tbsp butter (for buns)
Optional (but highly recommended):
- sliced onions
- pickles
- ketchup, mustard, or burger sauce
How to Make Smash Burgers with Crispy Edges and Juicy Centers
- Start with the beef — don’t overwork it. Just loosely divide it into 4 balls. Keeping it loose helps trap a bit of air, which makes the texture more tender. If you pack it too tightly, it cooks more like a dense patty.
- Heat a pan or skillet until it’s really hot. This part really matters. If it’s not hot enough, you won’t get that deep crust — and that’s the whole point of a smash burger.
- Place the beef ball onto the hot surface and immediately smash it down firmly using a spatula. I always press a bit more around the edges — that’s where the best crispy bits happen. Those uneven edges are what turn crispy and slightly lacy.
- Season right after smashing — salt and pepper stick better this way. Let it cook without touching it for a couple of minutes. If you try to move it too early, it won’t develop that crust.
- Flip once the edges look dark and crispy. Add cheese right away so it melts properly while the other side finishes cooking. The second side cooks fast — don’t overdo it or you’ll lose juiciness.
- Toast the buns with a bit of butter until lightly golden. This adds texture and keeps them from getting soggy.
- Assemble while everything is still hot. The slight mess when it all comes together? I actually love that slightly messy, juicy bite — that’s when you know it turned out right.
If you’re missing a sauce, my Smash Burger Sauce Recipe really brings everything together.
Why Smash Burgers Taste Better Than Regular Burgers
It’s all about surface area.
When you smash the beef thin, more of it touches the hot pan. That creates a deeper crust (that almost crispy, beefy flavor) while still keeping the inside juicy.
Thick burgers → juicy
Smash burgers → juicy and crispy
Once you get that crust right, you’ll know exactly what I mean.
Tips for the Best Smash Burger Texture
- Don’t smash twice — only at the beginning
- Use high heat or it won’t crisp
- Slightly uneven edges = better texture
- Don’t overcrowd the pan — it lowers temperature
FAQ
Why shouldn’t you press burgers after flipping?
Because you push out the juices. Smash once at the beginning and leave it.
What kind of beef is best for smash burgers?
80/20 is ideal — enough fat for flavor and juiciness without being greasy.
Can you make smash burgers without a cast iron pan?
Yes, but a heavy pan works best. Thin pans don’t hold heat as well, which affects the crust.
Leave a Reply