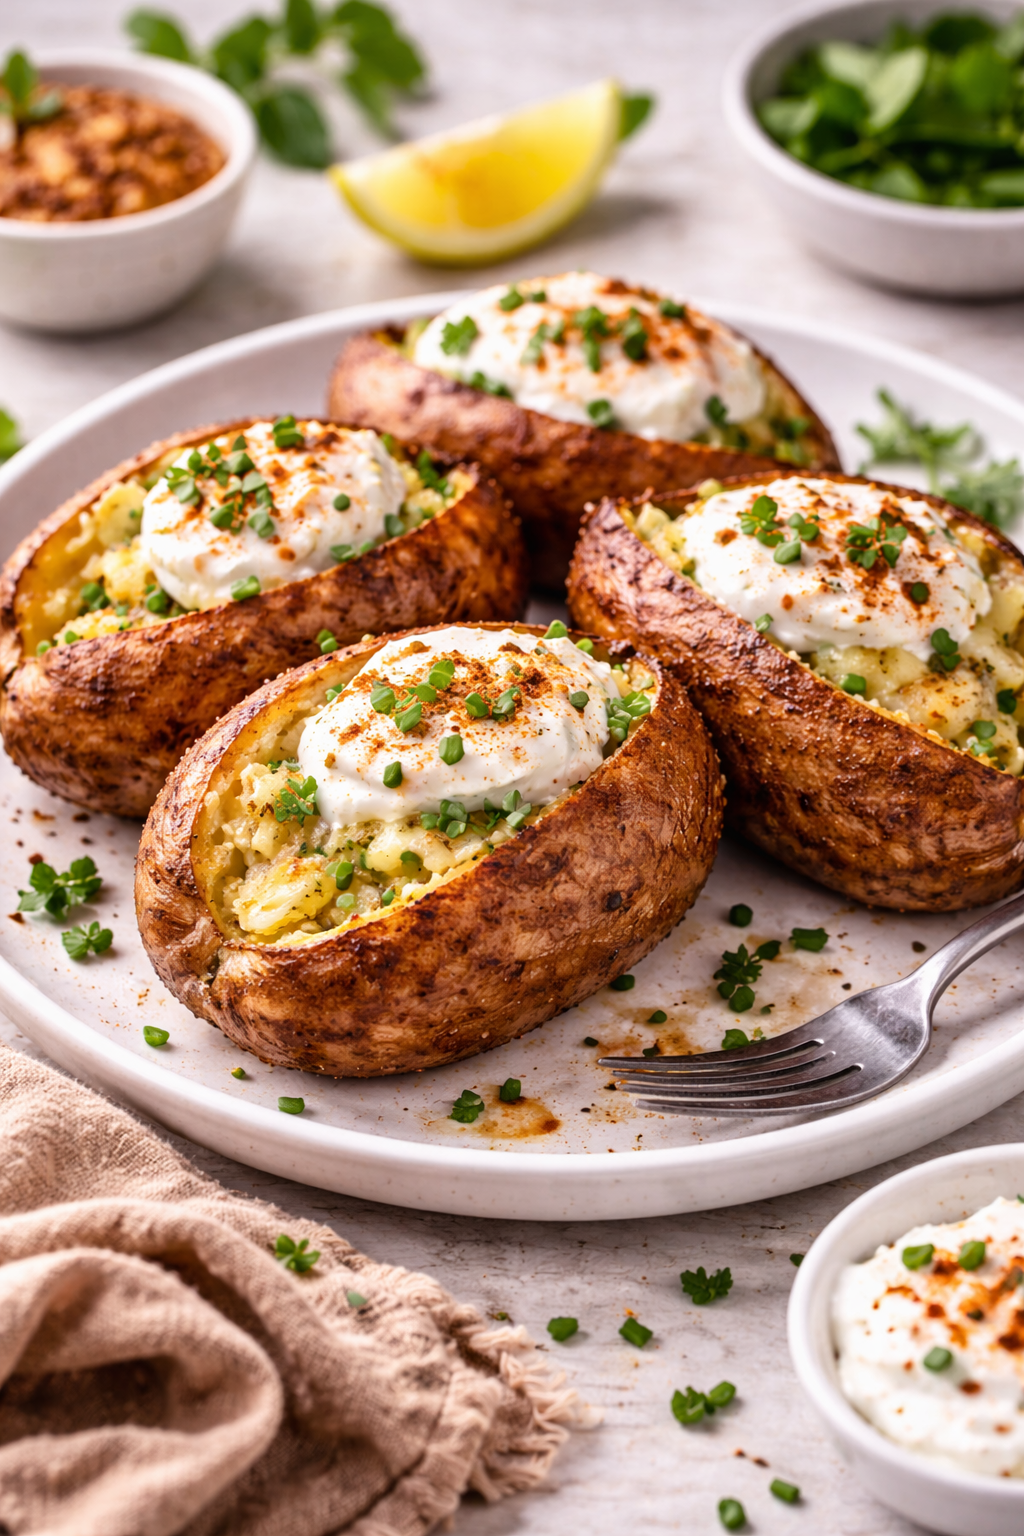
Air fryer baked potatoes are one of the easiest ways to get crispy potato skins and a fluffy interior without turning on the oven. The circulating heat of the air fryer creates golden, slightly crackly skins while the inside stays soft and steamy. Finished with garlic herb butter and a cool yogurt sauce, these potatoes can work as a hearty side dish or even a simple meal.
Why you’ll love this recipe
- crispy potato skins with fluffy centers
- easy air fryer method with simple ingredients
- flavorful garlic herb butter topping
Difficulty – Easy
Prep Time – 10 minutes
Cook Time – 40 minutes
Total Time – 50 minutes
Servings – 4
Related recipes: Easy Air Fryer Lasagna Without Oven Baking
Quick Air Fryer Potato Peel Chips for a Crunchy Snack
Ingredients
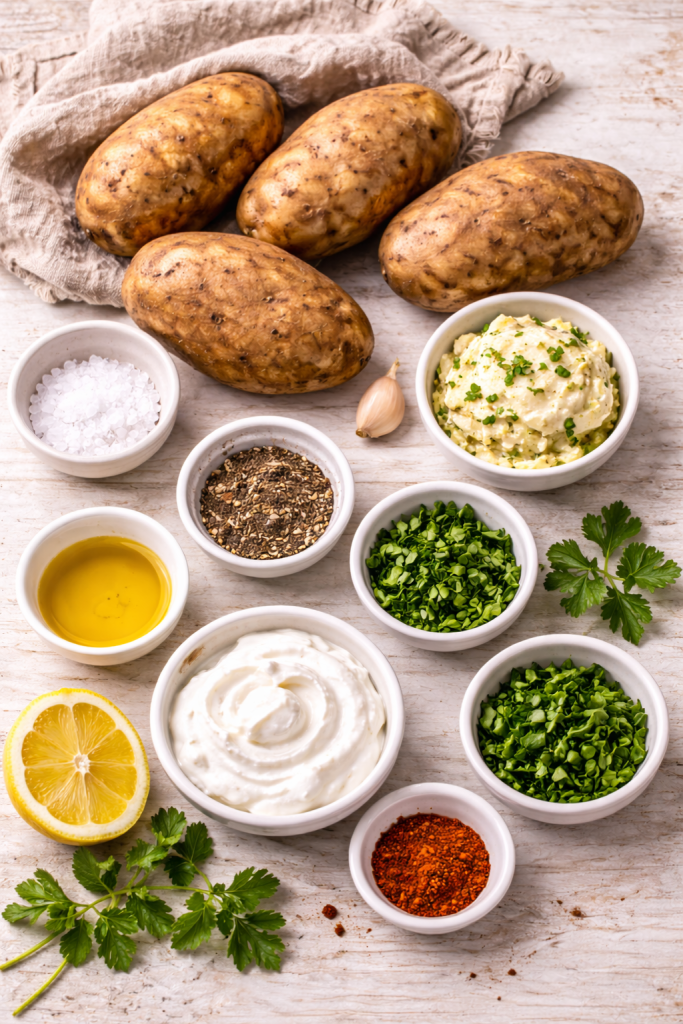
Ingredients Overview
This recipe relies on just a few ingredients, but each one helps create a satisfying baked potato.
Russet potatoes are ideal for baking because their high starch content produces a fluffy interior. Their thick skins also become crisp when cooked in hot circulating air.
Olive oil and salt coat the skin before cooking. This step helps draw out moisture so the potato skins roast rather than steam.
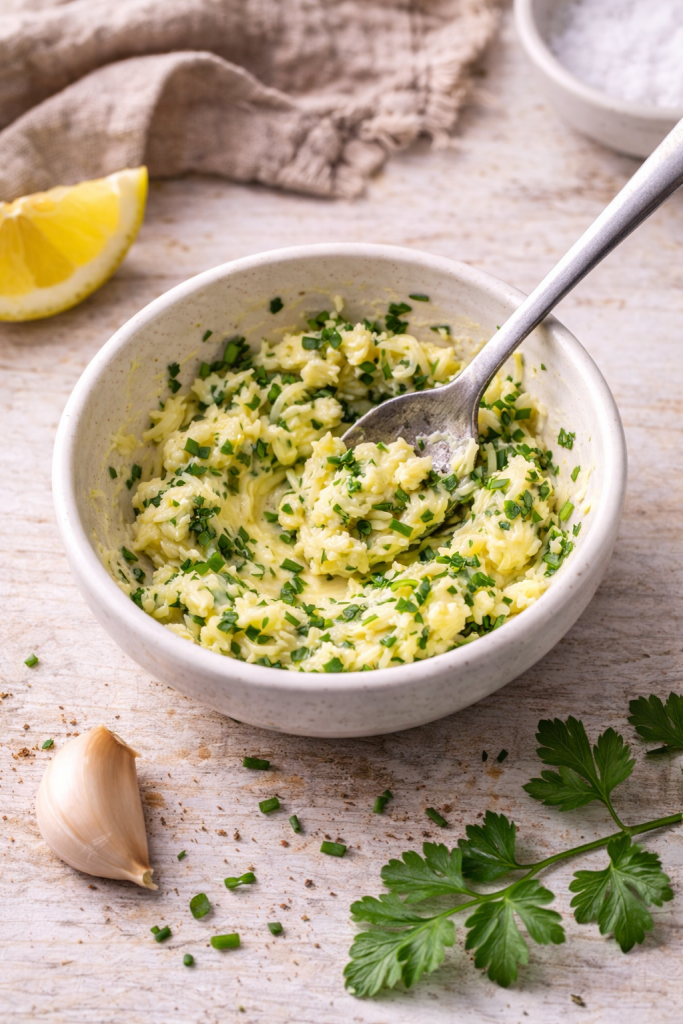
Garlic herb butter adds rich flavor once the potatoes are cooked. The butter melts into the fluffy interior and carries the aroma of fresh herbs.
Finally, Greek yogurt sauce adds a cool, tangy contrast that balances the richness of the butter and the warmth of the potato.
Why This Recipe Works
Air fryers cook food using rapidly circulating hot air. This allows potatoes to develop crispy skins without needing long baking times.
Piercing the potatoes with a fork allows steam to escape as they cook. This prevents the skins from bursting and helps the interior become light and fluffy.
Another important step is coating the skins lightly in oil. Oil conducts heat and helps the skins brown evenly.
The garlic herb butter is added after cooking so the herbs stay fresh and aromatic rather than burning in the hot air fryer.

Choosing the Best Potatoes for Baking
Not all potatoes bake the same way. For this recipe, russet potatoes work best because they contain more starch than waxy potatoes.
Starchy potatoes create a dry, fluffy interior that easily absorbs butter and toppings.
If russet potatoes are not available, you can also use:
- Idaho potatoes
- large Maris Piper potatoes
- Yukon Gold potatoes (slightly creamier texture)
Avoid very waxy potatoes like red potatoes because they remain dense after baking.
How the Air Fryer Makes Crispy Potato Skin
In a conventional oven, baked potatoes rely on dry heat from all sides.
Air fryers use a fan-driven heat system, which moves hot air quickly around the food. This helps evaporate moisture from the potato skin and encourages browning.
Because the heat is concentrated, the cooking time is often shorter than oven baking, while still producing the same crispy texture.
Instructions
- Scrub the potatoes under running water to remove any dirt.
- Dry them thoroughly with a kitchen towel.
- Pierce each potato several times with a fork.
- Rub the potatoes with olive oil and sprinkle them with sea salt and black pepper.
- Place the potatoes in the air fryer basket, leaving space between them.
- Tip: Proper airflow around each potato helps the skins crisp evenly.
- Cook at 200°C (400°F) for about 35–40 minutes, turning once halfway through.
- Check doneness by inserting a knife into the center. It should slide in easily.
- While the potatoes cook, mix softened butter, grated garlic, parsley, and chives in a small bowl.
- In another bowl, stir together Greek yogurt and lemon juice.
- When the potatoes are done, remove them from the air fryer and let them rest for 2 minutes.
- Tip: Resting briefly allows steam inside the potato to settle so the interior stays fluffy.
- Slice each potato open lengthwise.
- Add a spoonful of garlic herb butter to each potato.
- Top with a dollop of yogurt sauce and a pinch of smoked paprika if desired.
Common Mistakes
Skipping the oil coating
Oil helps crisp the potato skin and prevents it from becoming tough.
Overcrowding the air fryer
Air circulation is essential for even cooking.
Not piercing the potatoes
Steam buildup can cause potatoes to split during cooking.
Flavor Variations
These baked potatoes can easily be customized with other toppings.
For a cheesy version, add shredded cheddar during the last few minutes of cooking.
For a Mediterranean twist, top with feta cheese, olives, and extra herbs.
You can also turn them into a full meal by adding roasted vegetables or sautéed mushrooms.
More ideas: Easy Crispy Breaded Pumpkin Bites
Fresh Greek-Style Zucchini Noodle Salad
Roasted Beets with Burrata and Honey Mustard Dressing

Serving Ideas
Air fryer baked potatoes work well with many meals.
Serve them alongside:
- grilled chicken
- roasted vegetables
- simple green salad
They can also be served as a main dish with several topping options.
Storage Tips
Leftover baked potatoes can be stored in an airtight container in the refrigerator for up to three days. Reheat them in the air fryer at 180°C (350°F) for about 6–8 minutes to restore crispness.
I often make these when I want something comforting but don’t want to heat the whole oven.

Leave a Reply