
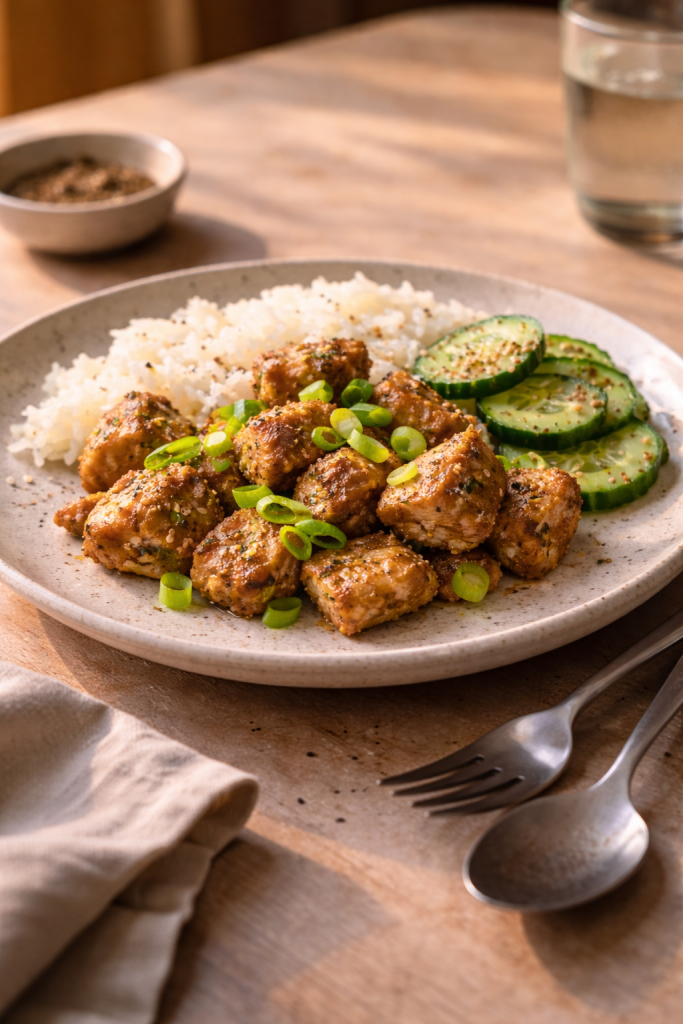
Some days you don’t want to marinate, plan, or stand over a pan. You just want something hot, savory, and properly satisfying with almost no effort. This air fryer chicken does exactly that — minimal prep, strong flavor, and that slightly crisp edge that makes it feel like a real meal.
Before You Start
- Difficulty: Easy
- Prep Time: 5 minutes
- Cook Time: 12–14 minutes
- Total Time: About 18 minutes
- Servings: 2
Why This Works
This recipe is built around dry heat and direct seasoning. Instead of relying on a batter or sauce, the chicken cooks exposed in the air fryer, which allows the surface to dry slightly and develop crisp, browned edges.
Chicken thighs are key here. They contain more fat than breast meat, which keeps them juicy even at high temperatures. That’s why you can cook them quickly without worrying as much about drying them out.
The combination of black pepper and optional white pepper creates depth — black pepper gives warmth, while white pepper adds a sharper, more lingering heat. The garlic ties it together, but it’s used lightly so it doesn’t burn during cooking.
Also worth trying: Air Fryer Meatballs with Everyday Ingredients
13 Easy Air Fryer Recipes for Quick Dinners, Snacks and Appetizers
Crispy Pecan Crusted Chicken with Honey Mustard
Ingredients
How to Make It
- Place the chicken into a bowl straight from the fridge. Starting cold helps it hold its shape during mixing and prevents the fat from melting too early.
- Add the oil, salt, black pepper, grated garlic, and white pepper if using. Toss briefly — just enough to coat the surface evenly. You’re not marinating, just seasoning.
- Spread the chicken in the air fryer basket in a loose, even layer. Leave small gaps between pieces so hot air can circulate — this is what creates browning instead of steaming.
- Cook at 200°C / 390°F for 7 minutes. During this time, the outside will start to firm up and lightly crisp.
- Shake the basket or turn the pieces. This exposes new surfaces to the heat and helps everything cook evenly.
- Cook for another 5–7 minutes. The chicken should be browned at the edges and fully cooked through. The surface should look slightly dry and crisp, not pale or soft.
- Scatter over the sliced spring onion just before serving. Adding it at the end keeps its freshness and prevents it from wilting too much.
What Actually Matters
- Spacing in the basket determines whether the chicken crisps or steams
- High temperature creates that slightly crisp exterior quickly
- Short cooking time keeps the inside juicy
- Minimal seasoning works because the browning adds flavor
Texture & Flavor
The final result should have contrast:
- lightly crisp, browned edges
- juicy, tender interior
- a clean, pepper-forward flavor
If the chicken looks pale, it likely needed more space or a bit more time. If it feels dry, it was cooked too long.
Ingredient Swaps & Variations
- Chicken breast instead of thighs
You can use breast meat, but reduce the cooking time slightly (start checking around 10–11 minutes total). Breast is leaner, so it dries out faster — cutting pieces slightly larger helps retain moisture. - Add cornstarch for extra crispness
Toss the chicken with 1–2 teaspoons of cornstarch before cooking. This creates a slightly drier surface, which leads to more noticeable crisp edges. - No white pepper
Simply skip it or increase black pepper slightly. White pepper adds a sharper, more lingering heat, but the recipe still works without it. - Extra flavor layer
Add a pinch of paprika or a splash of soy sauce. Paprika adds mild warmth and color, while soy deepens the savory profile (just reduce salt slightly if using it). - Garlic alternative
If you’re worried about garlic burning, use garlic powder instead. It distributes more evenly and is less likely to scorch at high heat.
Common Mistakes to Avoid
- Overcrowding the basket
When pieces are too close, they release moisture and start steaming instead of crisping. This leads to pale, soft chicken instead of browned edges. Always leave space between pieces or cook in batches. - Too much mixing or marinating
Letting the chicken sit too long with salt can draw out moisture, making the surface wet. A quick toss right before cooking works better here. - Cooking at too low a temperature
Lower heat won’t create that dry, slightly crisp exterior. The chicken may cook through but stay soft and less flavorful on the outside. - Overcooking
Even though thighs are forgiving, too much time will still dry them out. Look for browned edges and a firm but juicy interior — not a dry or stringy texture. - Adding spring onion too early
If added before cooking, it will burn or lose its freshness. Always add it at the end.
How to Serve
This chicken is very flexible and works in different ways depending on what you need:
- with rice for a quick, balanced meal
- wrapped in flatbread with a simple sauce
- added to a salad for something lighter
- or eaten on its own as a high-protein option
A squeeze of lemon or a light dipping sauce can also lift the flavor if you want a bit more contrast.
FAQ
Can I make this without oil?
A small amount helps with browning, but you can reduce it slightly. Without any oil, the surface may be drier and less evenly crisp.
How do I know it’s done?
The chicken should be firm to the touch and no longer pink inside. Juices should run clear.
Can I reheat it?
Yes — reheat in the air fryer for a few minutes to bring back some crispness. Avoid microwaving if possible, as it softens the texture.
Can I double the recipe?
Yes, but cook in batches. Overloading the basket will reduce quality.
Try this next: Air Fryer Crispy Chicken Wings
Crispy Air Fryer Brussels Sprouts (5 Ingredients, No Fuss)
Air Fryer Whole Roast Chicken (Minimal Prep, Juicy Result)

Leave a Reply