
Mini quiche are one of those things that look like you planned ahead. Like you’re hosting brunch or something. In reality… you just mixed a few ingredients and baked them in a muffin pan.
The best part? They’re hard to mess up once you get the base right. It’s really just eggs, cream, and whatever you feel like throwing in.
Also — they work for everything. Breakfast, snacks, random “what do I eat now” moments.
Quick Info:
- Difficulty: Easy
- Prep Time: 20 minutes
- Cook Time: 20–25 minutes
- Total Time: ~45 minutes
- Servings: 18–24 mini quiche
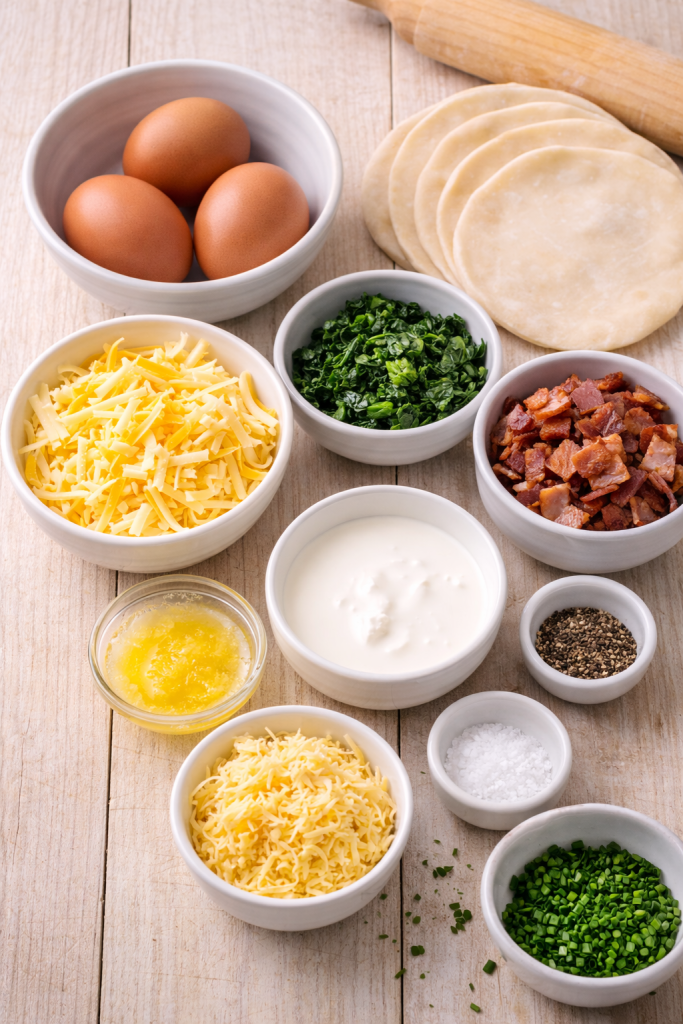
Ingredients
More ideas: Chocolate Protein Pudding (Thick, Creamy & Made with Almost Nothing)
Lemon Herb Grilled Chicken with Green Couscous Bowl
Crispy Air Fryer Onion Rings with Light Spiced Crunch

Instructions
- Preheat your oven to 375°F.
- Roll out the pie crust and cut small circles (a glass works fine). Press them into a greased mini muffin pan. Don’t worry if they’re not perfect — once baked, no one notices.
- If you have 5 extra minutes, pre-bake the crust for about 5 minutes. This helps avoid that slightly soggy bottom situation (worth it, honestly).
- In a bowl, whisk together eggs, cream, milk, salt, and pepper. Don’t rush this — you want it smooth and slightly airy.
- Add a little bit of your fillings and cheese into each crust first. Not too much — they’re small, and it’s easy to overfill.
- Pour the egg mixture over the top, filling each about ¾ full. They puff up slightly while baking.
- Bake for 20–25 minutes, until the tops are set and lightly golden.
- Let them cool for a few minutes before removing. If you try too early, they might fall apart (learned that one the annoying way).
What actually makes them better:
Use more cream than you think you need. That’s what gives that soft, almost creamy texture instead of something dry or rubbery.


Leave a Reply